Uploads
Learn how to handle uploads in your own fields, sections and panel views
k-upload component
All uploads in the panel are handled by the k-upload Vue component. The component takes care of opening the OS file picker for you. It can even take dropped files. It will then send the uploads to the API you specify and show file upload progress indicators in a dialog.
<template>
  <div>
    <k-button @click="upload" icon="upload">Upload</k-button>
    <k-upload ref="upload" @success="onSuccess" />
  </div>
</template>

<script>
export default {
  methods: {
    upload() {
      this.$refs.upload.open({
        url: this.$urls.api + "/my-plugin/upload"
      });
    },
    onSuccess() {
      this.$store.dispatch("notification/success", "The files have been uploaded");
    }
  }
};
</script>
Handling uploads in the API
Site files
You can upload global files for the entire site to the /api/site/files endpoint:
<script>
export default {
  methods: {
    upload() {
      this.$refs.upload.open({
        url: this.$urls.api + "/site/files"
      });
    }
  }
};
</script>
Page files
Files for pages must be uploaded to the particular files endpoint for each page:
<script>
export default {
  methods: {
    upload() {
      this.$refs.upload.open({
        url: this.$urls.api + "/pages/projects+project-a/files"
      });
    }
  }
};
</script>
Make sure to replace / with + in page IDs
You can use our internal URL builder to take care of correct page endpoint URLs:
<script>
export default {
  methods: {
    upload() {
      this.$refs.upload.open({
        url: this.$urls.api + "/" + this.$api.pages.url("projects/project-a", "files")
      });
    }
  }
};
</script>
To be honest, the naming for the url method is a bit misleading in this context. It actually only generats the relative path for the API. I.e. pages/projects+project-a/files
It takes the page ID as first argument and makes sure to encode all slashes correctly. It then appends the second argument to the path.
User files
Uploading files for users works in a very similar way as uploading files for pages.
<script>
export default {
  methods: {
    upload() {
      const userId = "5GjjUzXU";

      this.$refs.upload.open({
        url: this.$urls.api + "/users/" + userId + "/files"
      });
    }
  }
};
</script>
If you want to use our internal helper method here as well, you can write the example like this:
<script>
export default {
  methods: {
    upload() {
      const userId = "5GjjUzXU";

      this.$refs.upload.open({
        url: this.$urls.api + "/" + this.$api.users.url(userId, "files")
      });
    }
  }
};
</script>
Custom Route
In certain scenarios, you might want to parse or modify a file, once it has been uploaded – think of a CSV upload. This can be done in a custom plugin API route.
Plugin definition
Add the API route in the index.php of your plugin like this:
<?php

Kirby::plugin('your-name/uploader', [
    'api' => [
        'routes' => [
            [
                'pattern' => 'your-name/uploader',
                'method' => 'POST',
                'action' => function () {
                    return $this->upload(function ($source, $filename) {
                        $tmp = __DIR__ . '/uploads/' . $filename;
                        return F::copy($source, $tmp);
                    });
                }
            ]
        ]
    ]
]);
It's recommended to use a unique API endpoint path for your plugin endpoints, to avoid collissions with other routes. In this case, the endpoint will be available at https://yourdomain.com/api/your-name/uploader
Let's break down what happens within the route action:
The upload helper
return $this->upload(function ($source, $filename) {
  // ...
});
API routes provide a upload helper method, which can be used like above. The upload method automatically checks for uploaded files from the k-upload component. For each uploaded file, the callback will be executed and the callback receives the absolute path ($source) of the uploaded tmp file as first argument and the filename as second argument.
The upload method takes care of a few important things.
- It will handle all upload errors for you and throw translated exceptions that will be displayed by the
k-uploadcomponent in a human-readable way. - It will make sure to return proper filenames for all uploaded files
- It will automatically handle
post_max_sizeandupload_max_filesizeconfiguration issues and throw errors accordingly.
It can also make sure that you can only upload a single file per API call. Use the second argument of the upload method and set it to true to avoid multiple uploads.
return $this->upload(function ($source, $filename) {
  // ...
}, true);
Once the file has been uploaded, you can move it to a final location, parse it, modify it or delete it.
In our example, we will copy it to an uploads directory.
return $this->upload(function ($source, $filename) {
    $tmp = __DIR__ . '/uploads/' . $filename;
    return F::copy($source, $tmp);
}, true);
Be aware that the upload method does not help you with additional security precautions! It's your job in a custom upload route to validate the mime type and add additional checks to avoid malicious uploads.
MIME type checks & error handling
Here's a short example that uses the MIME class to add an additional MIME type check:
return $this->upload(function ($source, $filename) {
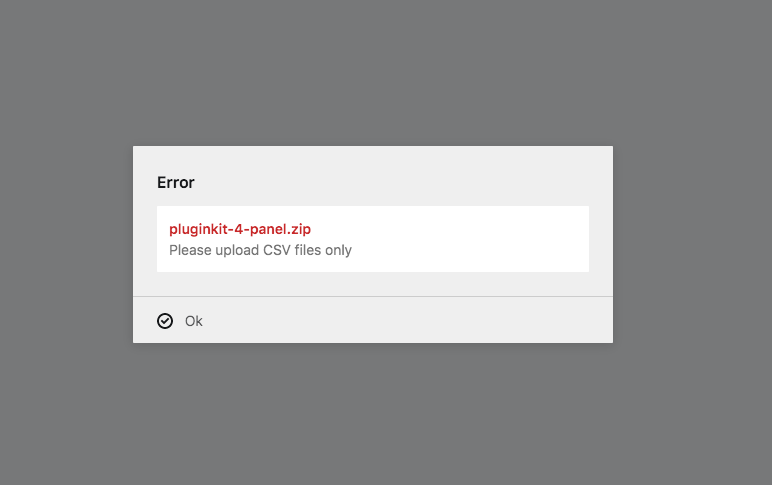
if (Mime::type($source) !== 'text/csv') {
throw new Exception("Please upload CSV files only");
}
$tmp = __DIR__ . '/uploads/' . $filename;
return F::copy($source, $tmp);
}, true);This example also demonstrates how you can handle errors in the callback. Exceptions will be automatically passed forward to the k-upload component and displayed in a nice way.
Connect your component
As a final step, we need to tell the k-upload component where to find our new endpoint:
<script>
export default {
  methods: {
    upload() {
      this.$refs.upload.open({
        url: this.$urls.api + "/your-name/uploader",
        accept: "text/csv",
        multiple: false
      });
    }
  }
};
</script>
The additional accept parameter helps to run the MIME type check already on the client side. It's not enough to just rely on this though. Always make sure to combine it with additional backend checks.
With multiple: false only a single file can be selected in the file picker. Again, this needs to be combined with the second argument in the upload helper to avoid multiple uploads in the backend.
Drag & drop uploads
The k-upload component can also be used to send dropped files to the API in the same way. Combine this with our k-dropzone component to get a very convenient setup for drag & drop uploads. Our example from above needs to be adjusted slightly:
<template>
  <div>
    <k-dropzone @drop="upload">
      Drop your file here
    </k-dropzone>

    <k-upload ref="upload" @success="onSuccess" />
  </div>
</template>

<script>
export default {
  methods: {
    upload() {
      this.$refs.upload.drop(files, {
        url: this.$urls.api + "/your-name/uploader",
        accept: "text/csv",
        multiple: false
      });
    }
  }
};
</script>
Instead of this.$refs.upload.open we use the this.$refs.upload.drop method and pass the files from the k-dropzone drop event as first argument.