Add authors to your pages
Assigning one or more people to pages like posts or projects is a common use case and Kirby's user system in combination with the users field is a perfect fit for this.
Creating authors
Authors can be created as Kirby users. A Kirby user can have one of different roles, and you can store any information in a user's profile, including a profile picture.
Before you add new users as authors, think about what information you want to store for these users. We can then set out to create a blueprint for our authors.
In this example, let's create an author.yml blueprint, which we store in /site/blueprints/users. In our user blueprint, let's define some fields:
title: Author
fields:
bio:
label: Bio
type: textarea
website:
label: Website
type: url
twitter:
label : Twitter account
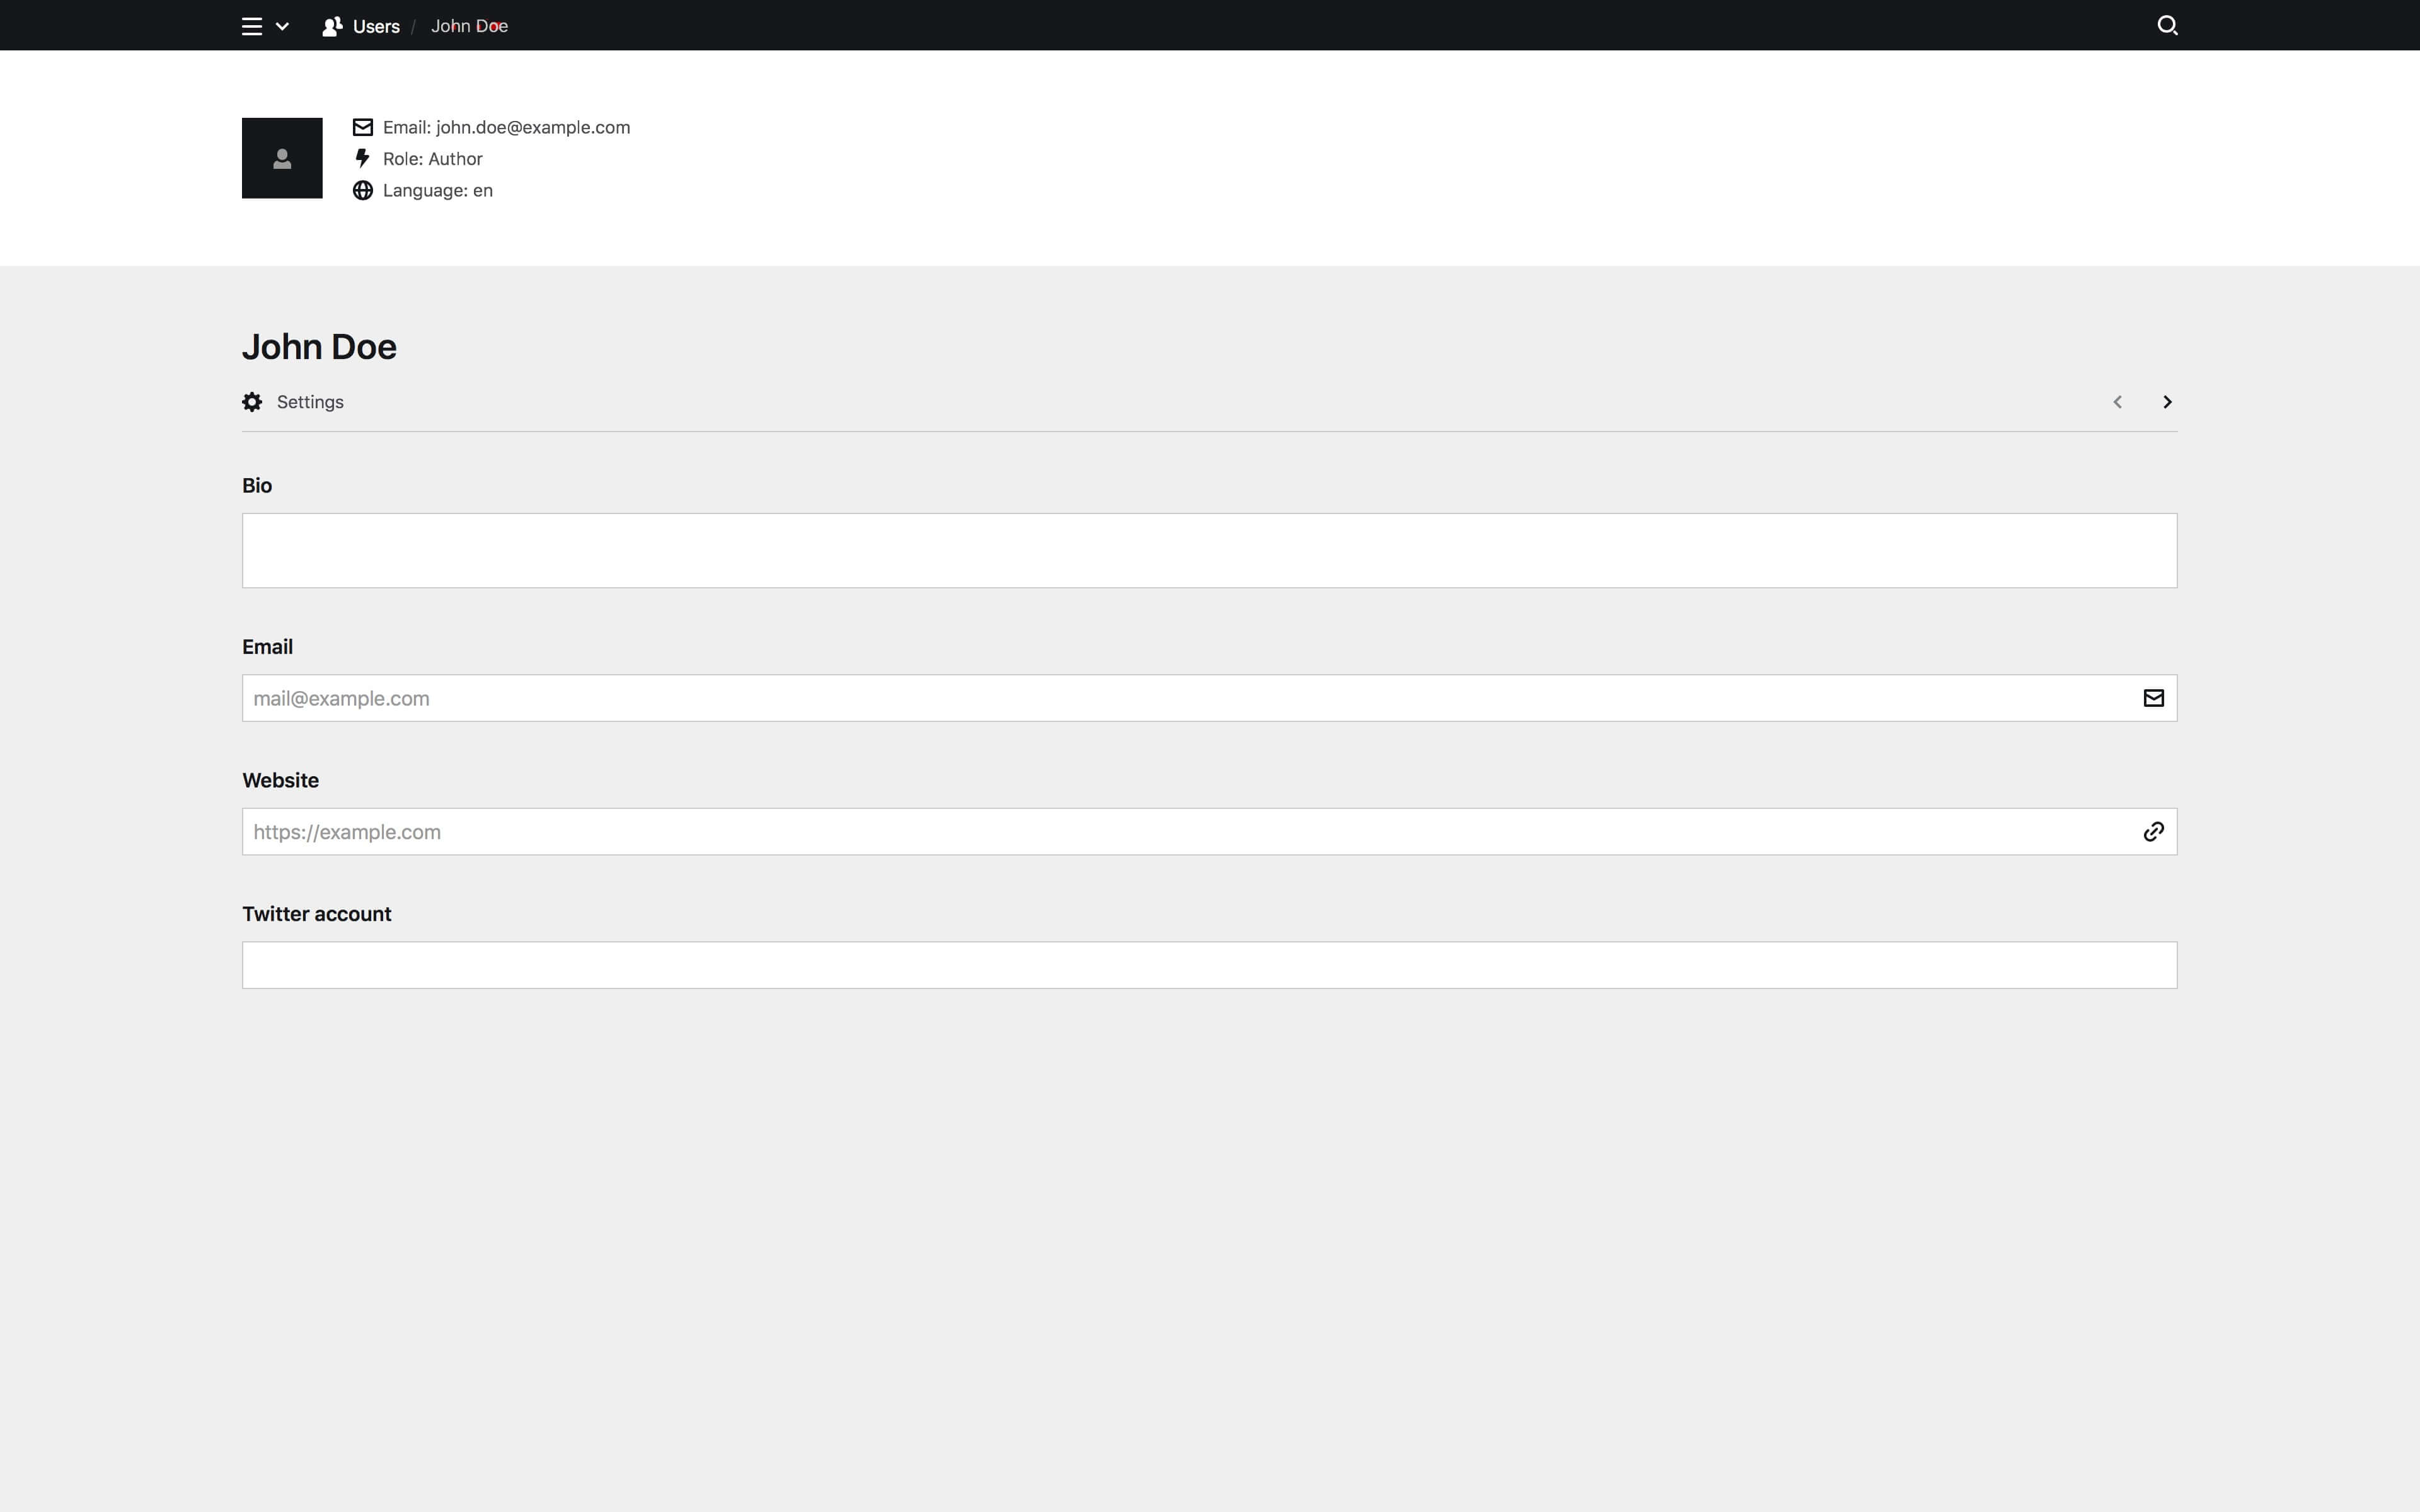
type: textSince name and email are default fields, we don't have to define them here. With this blueprint, we now have defined a new user role and can start adding authors with this role.
In the Panel, this setup will now look like this:
This can be extended to a full database of author contact details and more, depending on your use case.
How to select an author
Now that we have created a blueprint for the user and added some users in the Panel, we need a way to select one or more authors in our posts. Kirby has a users field that comes in handy for this purpose. Let's set it up in our article.yml blueprint:
sidebar:
  meta:
    type: fields
    fields:
      #...
      author:
        type: users
        multiple: false
      #...
In this example we have defined a sidebar with some meta data fields and an authors field. The authors field has some default settings and options you can find in the users field docs. Here we have kept it simple and only set the multiple option to false, because we only want to select a single author.
In the content file article.txt, the selected user is stored in yaml format
Title: Content in Kirby

----

Date: 2017-08-04 00:00

----

Text:  Some great text

----

Author:

- XBdlwR1W
Note that since Kirby 3.3.0 Kirby stores the user ID instead of the user email so that the reference to the user is persistent even if the email changes. The user ID is a random string (folder name that contains the user related files) assigned to a user when the user is created.
The article template
You can now fetch the author data in the article template. This is just a basic example of how the article template could look:
<?php snippet('header') ?>

<article>

  <h1><?= $page->title()->html() ?></h1>
  <time><?= $page->date()->toDate('d.m.Y') ?></time>
  <?= $page->text()->kirbytext() ?>

  <?php if($author = $page->author()->toUser()): ?>
    <aside class="author">

      <h1><?= $author->name() ?></h1>

      <?php if($avatar = $author->avatar()): ?>
        <figure>
          <img src="<?= $avatar->url() ?>">
        </figure>
      <?php endif ?>

      <?= $author->bio()->kirbytext() ?>

      <h2>On the web:</h2>

      <ul>
        <li><a href="<?= $author->website() ?>">Website</a></li>
        <li><a href="<?= $author->twitter() ?>">Twitter</a></li>
      </ul>

    </aside>
  <?php endif ?>
</article>

<?php snippet('footer') ?>
This is very extendible and can give your articles a nice personal touch.
An authors list
You can also build a list of all authors that have created an article and fetch their articles:
Create a new folder authors with an authors.txt file and an authors.php template.
In that template you can fetch all authors from the articles and build a list out of it.
authors.php template
<?php snippet('header') ?>
<?php
  // fetch all unique author ids from all articles
  $ids = $articles->pluck('author', '-', true);
  // get a list of all authors filtered by the ones with articles
  $authors = $kirby->users()->filterBy('id', 'in', $ids);
?>

<h1>Authors</h1>

<?php foreach($authors as $author): ?>
  <article class="author">
    <h1><?= $author->name() ?></h1>
    <?php if($avatar = $author->avatar()): ?>
      <figure>
        <img src="<?= $avatar->url() ?>">
      </figure>
    <?php endif ?>
    <?php if ($blog = page('blog')): ?>
      <ul class="articles">
      <?php
        // filter all articles per author
          $articles = $blog->children()->listed()->filter(function($child) use($author){
          return in_array($author->id(), $child->author()->yaml());
        });
        foreach($articles as $article): ?>
          <li><a href="<?= $article->url() ?>"><?= $article->title() ?></a></li>
        <?php endforeach ?>
      </ul>
    <?php endif ?>

  </article>
<?php endforeach ?>

<?php snippet('footer') ?>
The above code assumes that your articles are children of the blog folder. If your article parent is called differently, adapt the page name accordingly.
As an alternative, you can put this list of authors with their articles into the blog template instead of using a separate authors page. In that case, fetch the articles from the current page instead.
Each author will show up on http://yourdomain.com/authors with the user avatar and a list of articles they have written. This can be extended with more info about each author or more info about each article.