Plugin test workflow with PHPUnit
Introduction
In this guide, we will use PHPUnit to set up an optimized testing workflow for Kirby plugins with the ability to have custom blueprints and content for each plugin under a single Kirby installation.
Prerequisites
PHPUnit
If you don't have PHPUnit, follow the instructions on their site to install it.
Kirby
We need a Kirby installation too. It can house all our plugins. Since each plugin will have its own content (although it can use the content of the installation), we will use the Plainkit, which is very minimal:
cd path_to_your_web_root
git clone https://github.com/getkirby/plainkit kirbyplugins
Setup
Installing a plugin
Create and enter in the plugins folder where Kirby expects plugins:
cd kirbyplugins/site
mkdir plugins
cd plugins
Then, put your plugin there by adding it as a submodule. In this example, we will use the link-field plugin:
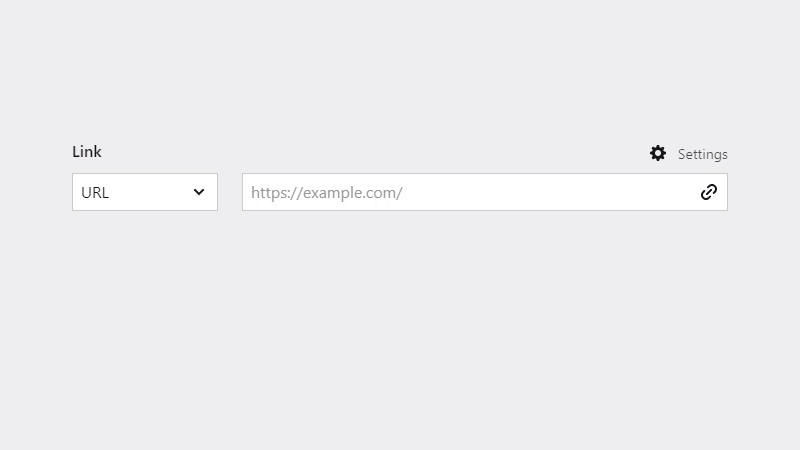
git submodule add https://github.com/OblikStudio/kirby-link-field link-fieldLet's check if we successfully added the plugin: Open the site.yml blueprint and add a new field with type link:
title: Site
preset: pages
unlisted: true
fields:
  foo:
    type: link
When you open the Panel, you should see something like this:
Bootstrapping Kirby
Open kirbyplugins/index.php and you'll see:
require 'kirby/bootstrap.php';

echo (new Kirby)->render();
This is the root script that handles every Kirby request. It requires another script, bootstrap.php, that loads all Kirby-related stuff and then creates an instance of the Kirby object that is used to render the page.
We need to do the same within our plugin. But we have to provide some configuration to the Kirby object and instead of rendering it, we will run some tests.
Folder Structure
In the plugin folder, create the following directory structure:
link-field
tests
- kirby
- suites
- bootstrap.php
The kirby folder will contain the plugin's custom blueprints and content, suites will contain our tests, and bootstrap.php will be the script that sets up Kirby.
The Bootstrap script
Open bootstrap.php and add:
<?php
require_once __DIR__ . '/../../../../kirby/bootstrap.php';

new Kirby();
echo site()->title();
This requires the same script that Kirby normally requires and echoes the site title so we can see if it works. Run the script with the PHP CLI and you should see Site Title in the output:
cd link-field/tests/
php bootstrap.php
Site Title
Custom Kirby components
Copy the installed kirbyplugins/content and kirbyplugins/site/blueprints and put them in the plugin's tests/kirby folder. You should have a similar directory structure like this:
link-field
tests
kirby
blueprints
- pages
- site.yml
content
- error
- home
- site.txt
- suites
- bootstrap.php
Then, modify the plugin's bootstrap.php script so that Kirby is set up to use those folders instead:
new Kirby([
  'roots' => [
    'content' => __DIR__ . '/kirby/content',
    'blueprints' => __DIR__ . '/kirby/blueprints'
  ]
]);

echo site()->title();
To test that, open tests/kirby/content/site.txt and change…
Title: Site Title…to:
Title: Plugin TitleRun the bootstrap.php script again and you should see the new title:
php bootstrap.php
Plugin Title
If everything was successful, remove the echo line from the bootstrap.php script.
Tests
You should check the PHPUnit documentation to learn how to write tests. We are going to do the same thing here, basically. Create tests/suites/MyTest.php and put the following inside:
<?php
use PHPUnit\Framework\TestCase;

final class PluginTest extends TestCase {
  public function testTitleValue () {
    $this->assertEquals(site()->title()->value(), 'Plugin Title');
  }
}
To run the test, we use the phpunit command, supply the plugin's bootstrap.php script, and specify the folder containing the tests:
phpunit --bootstrap ./bootstrap.php --testdox ./suitesYou should see a similar output:
PHPUnit 8.2.3 by Sebastian Bergmann and contributors.

Plugin
 ✔ Title value

Time: 246 ms, Memory: 10.00 MB

OK (1 test, 1 assertion)
All that's left now is adding more tests!
Extras
Autoloading
If your plugin uses classes, you would normally autoload them before running the tests. However, you don't have to in this case because you probably include the classes in your plugin's index.php file already. When testing, the plugin's bootstrap.php loads Kirby, which loads our plugin, which then loads our classes.
Composer Scripts
Running the test command manually each time can be tedious. You can take a look at Composer scripts and use them instead. To do that, copy the test command to your plugin's Composer configuration and adjust the paths accordingly:
"scripts": {
  "test": "phpunit --bootstrap ./tests/bootstrap.php --testdox ./tests/suites"
}
Then, execute composer run test in your shell and the tests should run.
Using the Panel
To be extra fancy, you can use the Panel to edit your plugin's custom content. Open the plugin's bootstrap.php script and change it so that the created Kirby object is returned:
require_once __DIR__ . '/../../../../kirby/bootstrap.php';

return new Kirby([ // <- notice the `return`
  'roots' => [
    'content' => __DIR__ . '/kirby/content',
    'blueprints' => __DIR__ . '/kirby/blueprints'
  ]
]);
After that, modify the installation's root index.php so that it uses this Kirby object instead:
require 'kirby/bootstrap.php';

// echo (new Kirby)->render();
echo (require 'site/plugins/link-field/tests/bootstrap.php')->render();
You might have noticed that kirby/bootstrap.php is required both in index.php and in our plugin's bootstrap.php. That's OK because our own script uses require_once so that the file is included only once.
If you open the Panel, you should see your custom plugin content and be able to edit it. Any changes you make will be saved to the plugin's content folder.
Other custom components
In this guide, we used only custom blueprints and content. However, you can define other custom components for your plugin as well. To do so, change the roots in your plugin's bootstrap.php accordingly. This means you can have global setups in your Kirby installation and each plugin can define its own components as needed.