Virtual files
With Kirby, you can merge and aggregate all sorts of content from different sources. This does not only work for pages that you can create from APIs, spreadsheets or databases, but also for files. In this recipe, we will look into two options how we can implement this (and briefly mention another alternative without actually implementing it).
Note that while the two options discussed in this recipe focus on images, it would work just as well for other file types.
Prerequisites
- A running Kirby installation: Plainkit or Starterkit
- A code editor
- Basic understand of Object Oriented Programming is helpful for a better understanding of the second example
Ready? Let’s get going…
Preps
Since files in Kirby always belong to either a page object or the site object, let’s first create a new photos page in the /content folder and add a text file called photos.txt.
The other files we need for the two example implementations all go into a plugin, so that we have everything we need in one place.
So the second step is to create a new plugin folder at /site/plugins/virtual-files with the obligatory index.php inside it.
Option 1: The factory method
For our first example, we need a page model for the virtual files logic, a template to render the results of our endeavors on the frontend, a blueprint for the page in the Panel, and we also add a file blueprint for later use.
index.php
In the index.php file we require the file that will contain the page model, and register blueprints, page model and template:
<?php

use Kirby\Cms\App as Kirby;

require __DIR__ . '/models/photos.php';

Kirby::plugin('cookbook/virtual-files', [
  'blueprints' => [
    'files/virtual-file' => __DIR__ . '/blueprints/files/virtual-file.yml',
    'pages/photos'       => __DIR__ . '/blueprints/pages/photos.yml',
  ],
  'pageModels' => [
    'photos'             => 'PhotosPage',
  ],
  'templates'  => [
    'photos'             => __DIR__ . '/templates/photos.php',
  ],
]);
Next, create those four files in the file system according to the following file structure:
virtual-files
blueprints
files
- virtual-file.yml
pages
- photos.yml
models
- photos.php
templates
- photos.php
- index.php
Virtual files page model
Let’s continue with creating the page model that overwrites the original files method. The files method by default returns the files that physically exist in the current page folder. Instead, we will use an array with file props. The basic props we need here are the filename and the URL, but we also add a template property, so that we can later show file information in the Panel’s file view. Then we pass this array to the Files::factory method:
<?php

use Kirby\Cms\Page;
use Kirby\Cms\Files;

class PhotosPage extends Page
{

  public function files()
  {
    if ($this->files !== null) {
      return $this->files;
    }

   $files = [
        [
          'filename' => 'kdEV_pbBUS0.jpg',
          'template' => 'virtual-file',
          'url'      => 'https://images.unsplash.com/photo-1622842182823-28bfbfba47e3?ixid=MnwyMzY4NjZ8MHwxfGFsbHw4fHx8fHx8Mnx8MTYyMjk0MTQzMA&ixlib=rb-1.2.1',
        ],
        [
          'filename' => 'EMhqiJ_n3Ks.jpg',
          'template' => 'virtual-file',
          'url'      => 'https://images.unsplash.com/photo-1622900644813-8ce47cdf99cf?ixid=MnwyMzY4NjZ8MHwxfGFsbHwyfHx8fHx8Mnx8MTYyMjk0MTQzMA&ixlib=rb-1.2.1',
        ],
        [
          'filename' => '_FKumMLed74.jpg',
          'template' => 'virtual-file',
          'url'      => 'https://images.unsplash.com/photo-1622725573495-fd719c1e140c?ixid=MnwyMzY4NjZ8MHwxfGFsbHwzfHx8fHx8Mnx8MTYyMjk0MTQzMA&ixlib=rb-1.2.1',
        ],
        [
          'filename' => 'QxaJ1Abz12w.jpg',
          'template' => 'virtual-file',
          'url'      => 'https://images.unsplash.com/photo-1622898809226-eefe24316347?ixid=MnwyMzY4NjZ8MHwxfGFsbHw0fHx8fHx8Mnx8MTYyMjk0MTQzMA&ixlib=rb-1.2.1',
        ],
        [
          'filename' => 'nmk188HvO_A.jpg',
          'template' => 'virtual-file',
          'url'      => 'https://images.unsplash.com/photo-1622902321275-2436f4717db3?ixid=MnwyMzY4NjZ8MHwxfGFsbHw1fHx8fHx8Mnx8MTYyMjk0MTQzMA&ixlib=rb-1.2.1',
        ],
        [
          'filename' => 'GHUGG3yu2BY.jpg',
          'template' => 'virtual-file',
          'url'      => 'https://images.unsplash.com/photo-1622461916756-96452ce31a92?ixid=MnwyMzY4NjZ8MHwxfGFsbHwyfHx8fHx8Mnx8MTYyMjk3Mzg1Mg&ixlib=rb-1.2.1',
        ],
      ];

    return $this->files = Files::factory($files, $this);
  }
}
For the $files array in this example I picked some random URLs from Unsplash, but you can of course replace these with any file URLs of your liking.
Template
We also want a template to render the files on the frontend. For the purposes of this recipe, we keep this very simple:
<?php snippet('header') ?>
<article>
  <h1 class="h1"><?= $page->title()->html() ?></h1>
    <ul style="display: grid; grid-template-columns: 1fr 1fr 1fr; grid-column-gap: 0.25rem">
    <?php foreach($page->files() as $file): ?>
      <li><?= $file ?></li>
    <?php endforeach ?>
  </div>
</article>
<?php snippet('footer') ?>
Let’s check the result on the frontend. Open the page URL in a browser, for example http://localhost/photos (or whatever your base URL is).
Great, that worked! Wasn’t this easy?
Virtual files page blueprint
Before we can visit the page in the Panel, let’s create a basic page blueprint for the page…
title: Photos

sections:
  files:
    layout: cards
    size: medium
    image:
      cover: true
…and modify the pages section in site.yml so that we can easily access the photos page.
# …
pages:
type: pages
#create: default # Comment create option
templates:
- about
- home
- default
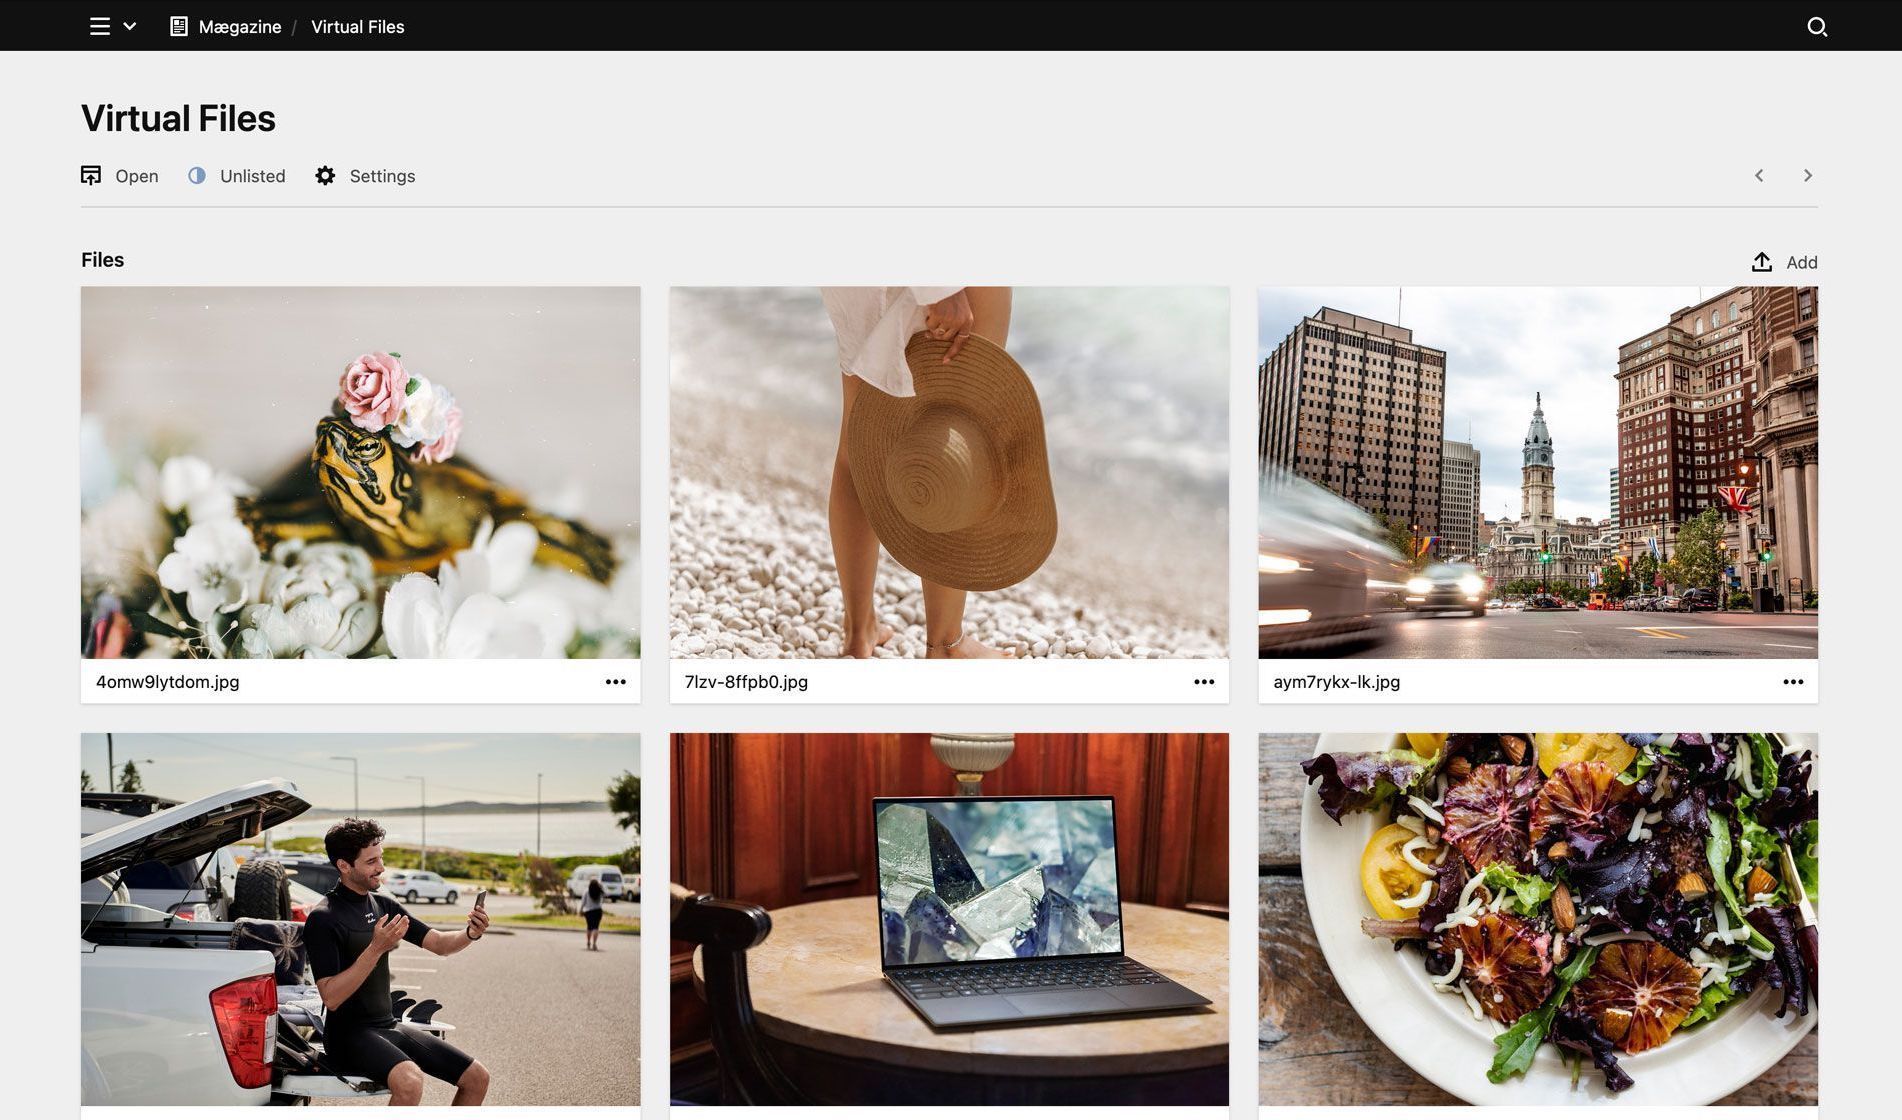
- photos # Add virtual files blueprintIf you now visit the page in the Panel, the file cards will be there, but oh, no file previews!
Why’s that? It worked on the frontend, after all? The reason why the images don’t work in the Panel (yet) is that the Panel uses thumbs for the previews, but Kirby cannot create thumbs from those virtual files.
For the moment, we therefore have to tell Kirby that we want to use the original file instead of a thumb.
File::version component
A file::version component allows us to define what Kirby should deliver when a thumb is requested. This component needs to either return a File object or a Kirby\Cms\FileVersion object. Here, we therefore return the original file instead of a thumb if the file template name is virtual-file, otherwise we let the the native component do its job.
Put the following code into a separate file (see filepath) and then register it in index.php:
<?php

use Kirby\Cms\App as Kirby;
use Kirby\Cms\File;

return function (Kirby $kirby, File $file, array $options = [])
{
  static $original;

  if ($file->template() === 'virtual-file') {
    return $file;
  }

  // if static $original is null, get the original component
  if ($original === null) {
    $original = $kirby->nativeComponent('file::version');
  }

  // and return it with the given options
  return $original($kirby, $file, $options);
};
Modified index.php
<?php

use Kirby\Cms\App as Kirby;

require __DIR__ . '/models/photos.php';

Kirby::plugin('cookbook/virtual-files', [
  'blueprints' => [
    'files/virtual-file'  => __DIR__ . '/blueprints/files/virtual-file.yml',
    'pages/photos'        => __DIR__ . '/blueprints/pages/photos.yml',
  ],
  'pageModels' => [
    'photos'              => 'PhotosPage',
  ],
  'templates'  => [
    'photos'              => __DIR__ . '/templates/photos.php',
  ],
  'components' => [
    'file::version'       => include __DIR__ . '/components/file-version.php',
  ],
]);
The file structure in the plugins folder should now look like this:
virtual-files
blueprints
files
- virtual-file.yml
pages
- photos.yml
components
- file-version.php
models
- photos.php
templates
- photos.php
- index.php
If we head back into the Panel, the file previews will finally be rendered.
In a real world project, the files would probably come from a database or an API. Let’s see how we can do that using the Unsplash API as an example.
Extra: Images from Unsplash API
If you don’t want to create an account with Unsplash, you can skip this section, but we will continue with the API for the rest of the recipe. To be able to use the API, create an account, add an application and grab your API key as described in the Unsplash API documentation.
All we need to do to get some images from Unsplash is change the page model a little bit.
To make the example work, first add your Unsplash API key to your config file:
<?php

return [
  // …other settings
  'unsplash.apikey' => 'your-api-key',
];
Then replace the hardcoded $files array from the previous example with the code below:
<?php
use Kirby\Cms\Page;
use Kirby\Cms\Files;
use Kirby\Http\Remote;
use Kirby\Toolkit\Str;

class PhotosPage extends Page
{
  public function files()
  {
    // use the cached array if available
    if ($this->files !== null) {
      return $this->files;
    }

    $results = [];
    $files   = [];
    $request = Remote::get('https://api.unsplash.com/photos/?client_id=' . option('unsplash.apikey'));
    if ($request->code() === 200) {
      $results = $request->json(false);
    }

    if (!empty($results)) {
      foreach ($results as $result) {
        $files[] = [
          'filename' => Str::slug($result->id) . '.jpg',
          'url'      => $result->urls->raw,
          'template' => 'virtual-file',
          'content'  => [
            'alt'          => $result->alt_description !== '' ? $result->alt_description : $result->description,
            'photographer' => $result->user->name ?? null,
            'license'      => 'Unsplash',
            'link'         => $result->user->portfolio_url ?? null,
          ]
        ];
      }
    }

    return $this->files = Files::factory($files, $this);
  }
}
We use Remote::get() with the Unsplash API URL as parameter to fetch some images, and if we get a result, we use the data to populate the $files array. In addition to the data from the example above, we also add some virtual metadata, like alternative text, photographer, etc.
The endpoint we are using here returns a single page of all photos with 10 items by default, sorted by latest photos. You can use the query parameters per_page to change the number of items returned per page, or order_by to change the sorting order. Check out the Unsplash API documentation for these parameters or for other endpoints you can use.
To round off the exercise, let’s add a blueprint for the files, so that the metadata entries will be visible in the Panel when we open the file view.
title: Virtual file
options:
  delete: false
  changeName: false
  replace: false
  update: false

sections:
  meta:
    type: fields
    fields:
      alt:
        label: Alternative Text
        type: text
      photographer:
        label: Photogapher
        type: text
        width: 2/3
      license:
        label: License
        type: text
        width: 1/3
      link:
        label: Link
        type: url
Note that we also set all files options like delete, changeName, replace and update to false, because these settings don’t make sense in our current use case.
And with this, we have arrived at the end of our first implementation option. Time for a coffee (tea) break, maybe?
Option 2: Extending the file class
While the first option above works well for a simple setup, we might end up with complex logic in the file::version component if we wanted to include files from different sources, use different file sizes for images, or do other crazy stuff.
We will be much more flexible if we use a custom file class that extends the Kirby\Cms\File class, instead. Such a setup will not only give us the opportunity to update file metadata in a database directly from the Panel, add additional properties to our files, and a lot more if we wanted to do that, but also use different file models for different page types.
Let’s start refactoring our code…
Unregister the file::version component
Since we don’t need the file::version component for this second example anymore, remove or comment the correspoding code in index.php, so that it looks like the very first version above.
Add file class
Next, we want to create a custom File class that we call VirtualFile. It extends the Kirby Kirby\Cms\File class and therefore inherits all its properties and methods.
<?php

use Kirby\Cms\File;

class VirtualFile extends File
{

  public function url(): string
  {
    return $this->url;
  }

  public function thumb($options = null)
  {
    return $this;
  }

  /**
   * The following methods are not relevant here and only mentioned for completeness sake;
   * they are needed if you have a use case where you actually want to delete files via the Panel
   * or update meta data in a database etc.
   */
  public function delete(bool $force = false): bool
  {
    // code to delete file
  }

  public function writeContent(array $data, string $languageCode = null): bool
  {
    // code to write meta data
  }
}
Since we can now overwrite all File class methods or add new properties and methods as needed, you probably get an idea of the powerful potential of this approach.
Modify index.php
In our index.php, we now have to require this file:
<?php

use Kirby\Cms\App as Kirby;

require __DIR__ . '/models/photos.php';
require __DIR__ . '/models/virtual-file.php';

// …Rest of code
Change page model
The next file that needs to be changed is the page model from the last example with the call to the Unsplash API. Most of the code is the same, with two basic changes.
<?php

use Kirby\Cms\Page;
use Kirby\Cms\Files;
use Kirby\Http\Remote;
use Kirby\Toolkit\Str;

class PhotosPage extends Page
{
  public function files()
  {
    // use the cached array if available
    if ($this->files !== null) {
      return $this->files;
    }

    $filesCollection = new Files([], $this);
    $results         = [];
    $files           = [];
    $request         = Remote::get('https://api.unsplash.com/photos/?client_id=' . option('unsplash.apikey'));

    if ($request->code() === 200) {
      $results = $request->json(false);
    }

    // create a files array from the data
    if (!empty($results)) {
      foreach ($results as $result) {
        $files[] = [
          'filename' => Str::slug($result->id) . '.jpg',
          'url'      => $result->urls->raw,
          'template' => 'virtual-file',
          'parent'   => $this,
          'content'  => [
            'alt'          => $result->alt_description !== '' ? $result->alt_description : $result->description,
            'photographer' => $result->user->name ?? null,
            'link'         => $result->user->portfolio_url ?? null,
            'license'      => 'Unsplash',
          ]
        ];
      }
    }

    // loop through the files array
    foreach ($files as $file) {
      // create a new VirtualFile object for each item
      $image = new VirtualFile($file);
      // and append it to the files collection
      $filesCollection->append($image->id(), $image);
    }

    return $this->files = $filesCollection;
  }
}
Instead of using the Files::factory() as before, we now create an empty Files object ($filesCollection), and then add instances of the new VirtualFile object to this collection.
Note that we also extended the the data array we pass to the new VirtualFile object with the parent property.
In this example, we use the call to the Unsplash API again, but you can replace this with the simple data array from the first example or with some data from other sources.
Thumbs
If you followed the examples with with the Unsplashed API and cared to take a look at the data that is returned for each image, you may have noticed that the API calls returns multiple URLs for different images sizes (raw, full, regular, small, and thumb). But by passing a query parameter to the raw URL, we are absolutely flexible with regard to file dimensions, quality or even mime type.
Unsplash uses Imgix under the hood, so this works exactly the same as with any other CDN, and thus the implementation we describe here can be used with other CDNs as well.
Let’s leverage this possibility to create thumbs for our images by modifiying the thumb() method of our custom VirtualFile class.
Modifying the thumb() method
In our example above, the thumb() method simply returned the file object. Now we can modify the method to instead return an instance of the same class, but with a modified URL if supported options are passed in the options array.
public function thumb($options = null)
{
  $query          = null;
  $options['w']   = $options['width'] ?? $options['w'] ?? null;
  $options['h']   = $options['height'] ?? $options['h'] ?? null;
  $options['fit'] = isset($options['crop']) ? 'crop' : $options['fit'] ?? null;
  $options['dpr'] = $options['dpr'] ?? 1; // set default to 2 if you want a higher device pixel ratio by default

  unset($options['width'], $options['height'], $options['crop']);

  if (empty($options) === false) {
      $query = '&' . http_build_query($options);
      return new self([
        'filename' => $this->filename,
        'url'      => $this->url . $query,
        'parent'   => $this->parent,
        'template' => $this->template,
      ]);
  }

  return $this;
}
In this method we check if the options array is empty. If not, we build a query string and return a modified instance of the VirtualFile object with a modified URL, i.e. we add the query string. You can read more about the supported parameters for dynamically resized images in the Unsplash documentation.
Note that we also created fallbacks for width, height and crop for Kirby’s standard option parameters, which allows us to also use the resize or crop shortcuts in our code instead of the thumb() method.
Instead of handling the thumb "generation" in the VirtualFile class, this could also be done in a file::version custom component, which we explained in our Kirby loves CDN recipe.
Call the thumb method in the template
In our template, we can now call the thumb() method with any supported parameters, including different mime types like webp via the fm option:
<?php snippet('header') ?>

<article>
  <h1 class="h1"><?= $page->title()->html() ?></h1>
    <ul style="display: grid; grid-template-columns: 1fr 1fr 1fr;">
    <?php foreach($page->files() as $file) : ?>
    <li><?= $file->thumb(['w' => 500, 'h' => 500, 'fit' => 'crop', 'dpr' => 2, 'fm' => 'webp'])?></li>
    <?php endforeach ?>
    </ul>
</article>

<?php snippet('footer') ?>
As already mentioned, if you don’t want to use these more complex thumb options, the simple crop() or resize() methods will do as well:
<li><?= $file->crop(500, 500)?></li>With this implementation in place, thumbs will now also work in the Panel, of course.
What about file dimensions etc?
Even if we know the file dimensions, we cannot simply pass the data to the VirtualFile constructor, because dimensions are not a property of the File class we are extending here but a property of the more specific Kirby\Image\Image class which itself extends the File class.
However, as we said above, we are free to add new properties and methods to our class, so if our data source provides this information, we can pass the properties to the class constructor.
Let’s add a dimensions property and overwrite the original class constructor with a custom constructor. We then set the value of the new property to a Kirby\Image\Dimensions object, and return the parent constructor with the given props.
And since we are at it, we might as well add some methods to retrieve the width, height, ratio and orientation from the new dimensions property. The ratio and orientation calculation is done by the Dimensions class from the width and height properties.
<?php

use Kirby\Cms\File;
use Kirby\Image\Dimensions;

class VirtualFile extends File
{

  protected $dimensions;

  public function __construct(array $props)
  {
    $this->dimensions = new Dimensions($props['width'] ?? 0, $props['height'] ?? 0);

    return parent::__construct($props),
  }

  public function width(): int
  {
    return $this->dimensions->width;
  }

  public function height(): int
  {
    return $this->dimensions->height;
  }

  public function ratio(): float
  {
    return $this->dimensions->ratio();
  }

  public function orientation(): string
  {
    return $this->dimensions->orientation();
  }

  // rest of methods here
}
Now all that’s left to do is pass the width and height we get from the API to the constructor in our files method in the page model:
// ...rest of code
if (!empty($results)) {
  foreach ($results as $result) {
    $files[] = [
      'filename' => Str::slug($result->id) . '.jpg',
      'url'      => $result->urls->raw,
      'template' => 'virtual-file',
      'parent'   => $this,
      'width'    => (int)$result->width ?? 0,
      'height'   => (int)$result->height ?? 0,
      'content'  => [
        'alt'          => $result->alt_description ?? $result->description,
        'photographer' => $result->user->name ?? null,
        'link'         => $result->user->portfolio_url ?? null,
        'license'      => 'Unsplash',
      ],
    ];
  }
}
// ...rest of code
Option 3: The placeholder variant
To round this off, I want to briefly mention another way to store images in the cloud instead of in the filesystem, that has been mentioned multiple times by Bastian.
The idea is to upload files to the file system like normal, and then use a file.create:after hook to upload the files to a remote blob storage like Azure or Amazon S3. Once the file is successfully uploaded, replace the actual file on disk with a 1x1px placeholder. In the content text file you can store additional metadata like the original dimensions, size and a reference ID to the uploaded file.
A custom file::url component can then take care of creating the correct URL to the file based on the reference ID stored in the metadata.
This way, Kirby will treat the files like normal files on disk, while they are actually tiny and don’t take up much space, while the large original files are stored in cheap blob storage.
Summary
In this recipe we explored two different ways to handle completely virtual files in Kirby. The third option still leaves placeholder files on disk and works best with image files. Depending on your use case and how flexible you want to be, you can now pick the one that is the best fit for the task.
Related documentation
- Page models
file::urlandfile::versioncomponents- Virtual pages
- Kirby loves CDN